Web Editing Duties
Essays
-
Make a list of the writers you have, and collect a printed
copy from each. Be sure to date the list and say who doesn't have an essay.
-
Open Netscape. Open Composer by clicking the little pen and
paper in the lower right corner.
 This is your editing window.
-
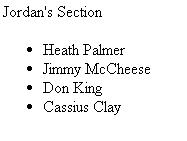
Type your name at the top, and then type a list of your writers.
-
Save:
-
Click the Save button.
-
Use the drop-down to find your name/space on the server.
-
Click the little folder icon
 to create a folder called <yourfirstnameweb>. (Example: jordanweb)
-
Double click on it.
-
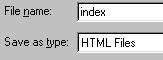
Name the file index and click save.
-
When the window for titling the page comes up, title the
page "Web for <YourName'sGroup>." (Example: Web for Jordan's Group.)
-
Read essay:
-
Circle words and phrases in the essay that could be potential
links.
Show the edited essay
and the evaluation sheet to me. Return the essay and the evaluation sheet
to the writer for revising.
Create Main Section Page
-
Blurbs! Intro for each writer's piece (about 2-3 sentences).
Try to get people to want to read the story!
-
Appropriate graphics and layout. Pictures! Title your
section!
-
I will help you create the links for the writers' stories.
-
See below for Tables and Pictures!
Pictures!
-
First, using the browser window,
 find one you want, right click on it, and choose Save Image As. Save
it into the same web folder. You can leave the filename alone unless it
has caps or spaces.
find one you want, right click on it, and choose Save Image As. Save
it into the same web folder. You can leave the filename alone unless it
has caps or spaces.
-
Go back to the editing window
 and put your cursor where you want the picture to be.
-
Click the button that says Image...and then Choose
File .
-
Find the image you just saved.
-
Be sure that the box that says "Leave image at the original
location" is NOT checked.
-
Done! You might want to surf and save all your pics first,
and then paste them in.
-
Be sure to note where they came from, because you have
to give appropriate credit/citation.
Tables. So you can
make your page look groovy by putting pictures and text side by side.
-
Click the table button
 .
.
-
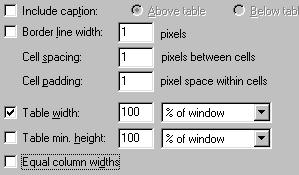
Uncheck the boxes that say "Border line width" and
"Equal column widths."
-
Decide how many columns and rows you need.

-
Click ok.
-
Now cut (Control X), and paste (Control V) the parts of your
web page into the table. Keep saving and previewing
 to see what it looks like.
-
You can add rows and columns as you need them by RIGHT-CLICKING
in the table where you want the row or column to go, and choosing INSERT,
and the ROW or COLUMN.
Linking to an Outside Site-- like when
you use a picture or information from another site and need to give credit
and a link back:
-
Surf to the site with the browser window.
-
Click once in the url box, and Control C to copy the address.

-
Go back to the editing window,
select the keyword, right-click, choose Create Link Using Selected,
and this time paste -- Control V -- the address in the Link to window.
PROOFREADING!
-
Proofread your Editor Page. Again.
-
When your writers think they are done with their pages:
-
Read over their shoulders and see if you can spot any
mechanical errors.
-
MAKE SURE THERE IS A "BACK TO ESSAY" LINK ON EVERY
PAGE.
-
MAKE SURE ALL LINKS WORK.
-
CHECK THAT THEY'RE 3 LAYERS DEEP AT LEAST ONCE.
-
Come see me, and we'll start making the links to the writers'
pages.
WebZines Project!
Day
One | Day Two | Day
Three | Days 4-6 | Editor
Directions | Rubrics